Open your own shop on allthe, hosted at yourhandle.allthe.store. Claim a handle, turn on payouts, add products and publish. Buyers pay you directly and we make and ship every order.
A Storefront is your own shop, hosted by us. There is no platform to sign up for, no theme to buy and no monthly fee. You claim a handle, turn on payouts, pick the products you want to sell and publish. Your buyers check out on your store, the money lands in your bank, and we print, pack and ship every order under your brand.
Setting one up takes about fifteen minutes. This page walks through every screen in your allthe admin, in the order you will meet them.
What you get
- Your own address. Every store you build lives at
yourhandle.allthe.store/store-name, hosted and secured by us. - As many stores as you like. Each one is fully independent: its own products, prices, theme and sales figures. One for a band, one for a drop, one for a client.
- Buyers pay you directly. You are the seller. Payment goes to your own Stripe account, not into a balance we hold for you.
- Your prices, your margin. Set the retail price on every product, and override it per store if a particular shop should charge differently.
- Nothing to hold. Products are made when they are bought. No stock, no minimums, no leftover boxes.
- Buyers can reach you. Every store carries a contact button, and replies go to the email on your account. Your buyer never needs an allthe login.
1Claim your handle
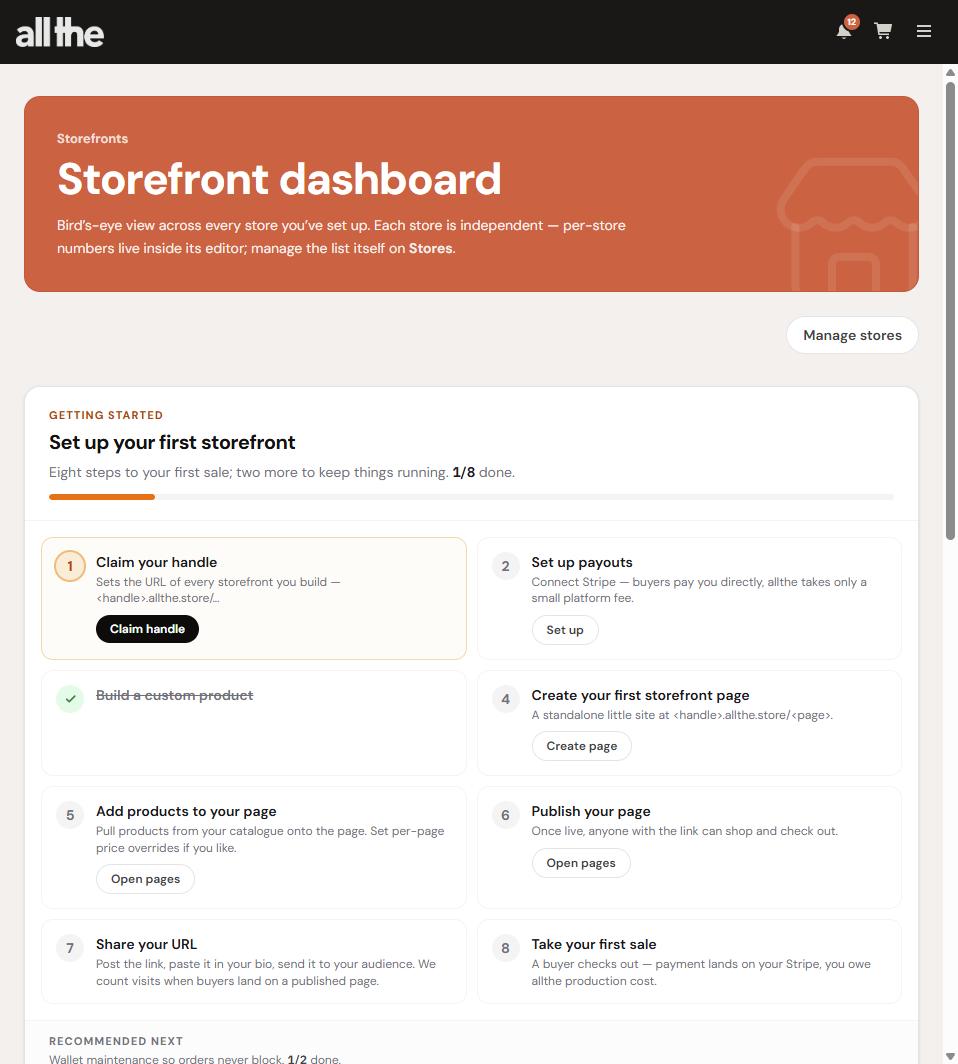
Your handle is the one thing every store URL is built from, so it is the first step and everything else is locked until it is done. Open Storefronts in your dashboard and the getting started checklist is the first thing on the page: eight steps to your first sale, and two more that keep things running afterwards. It ticks itself off as you go and disappears once you are finished.
Hit Claim handle and you land on storefront settings. A handle is 3 to 30 characters, lowercase letters, numbers and single dashes, and it has to start with a letter. Pick the one you would put on a poster.
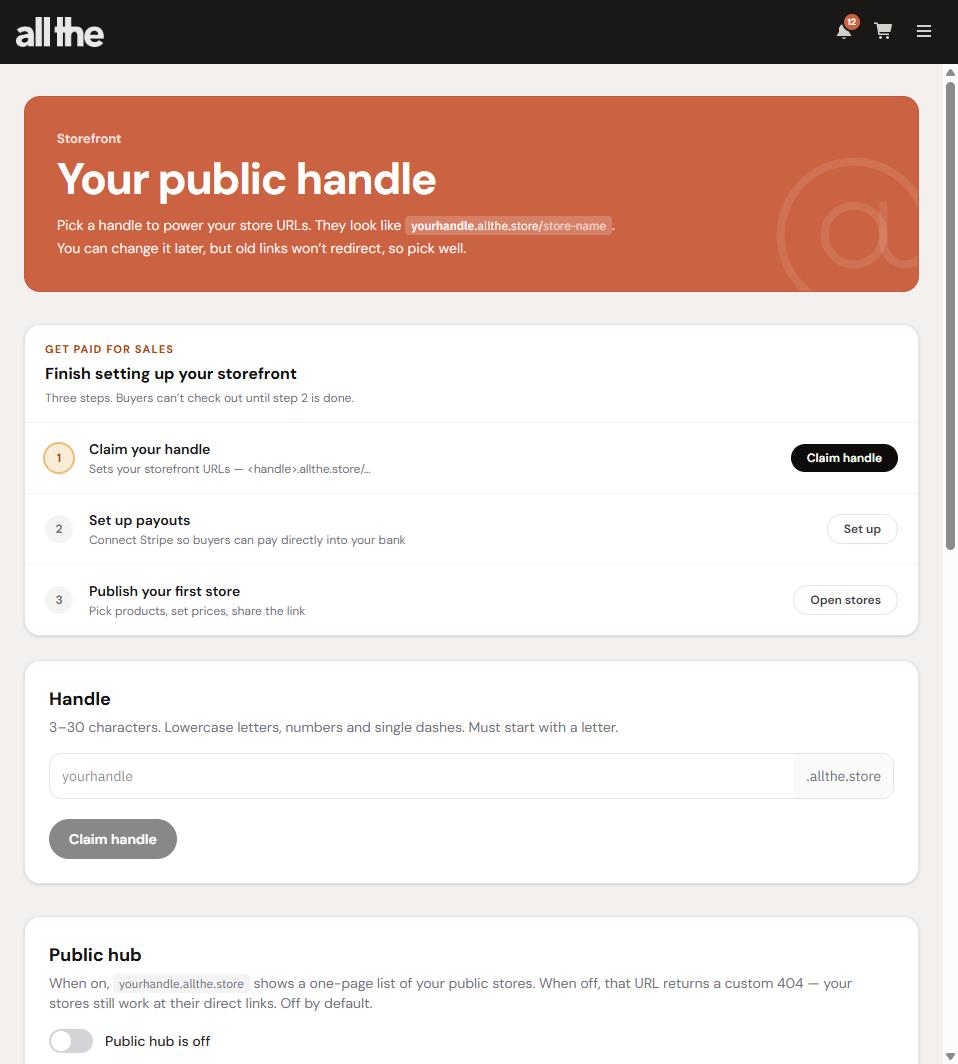
Choose carefully. You can change your handle later, but old links will not redirect to the new one. Anything you have already posted stops working, so it is worth a minute of thought now.
Underneath the handle field is the public hub toggle, and it is off by default. Turn it on and yourhandle.allthe.store shows a single page listing all of your public stores. Leave it off and that address returns a not found page, while your stores still work perfectly at their own direct links. Off is the right setting if you want each store to feel like a standalone site, or if one of them is a private drop you would rather not advertise.
2Turn on payouts
Storefront buyers pay you, not us, so we need somewhere to send the money. Open Payouts from the checklist and connect a Stripe account. Stripe asks for your business details and bank account and runs its own identity checks. It usually takes a few minutes, and Stripe may come back for more information before it enables the account.
This one is a hard gate. Until payouts are enabled your buyers cannot check out at all. You can build and preview stores before it is done, but do not share a link until this step is green.
3Build a product
Storefronts sell from My Products, the same products you would push to Shopify or Etsy, so if you have already built some you can skip straight to the next step. If not, open the catalogue, choose a blank, add your design and set a retail price. The price you set here is the default; you can override it per store later.
4Create a store
With a handle claimed, New store opens the editor. Each store is its own little site with its own product list, prices, theme and limited edition rules, which is why sellers usually end up with several rather than one big one.
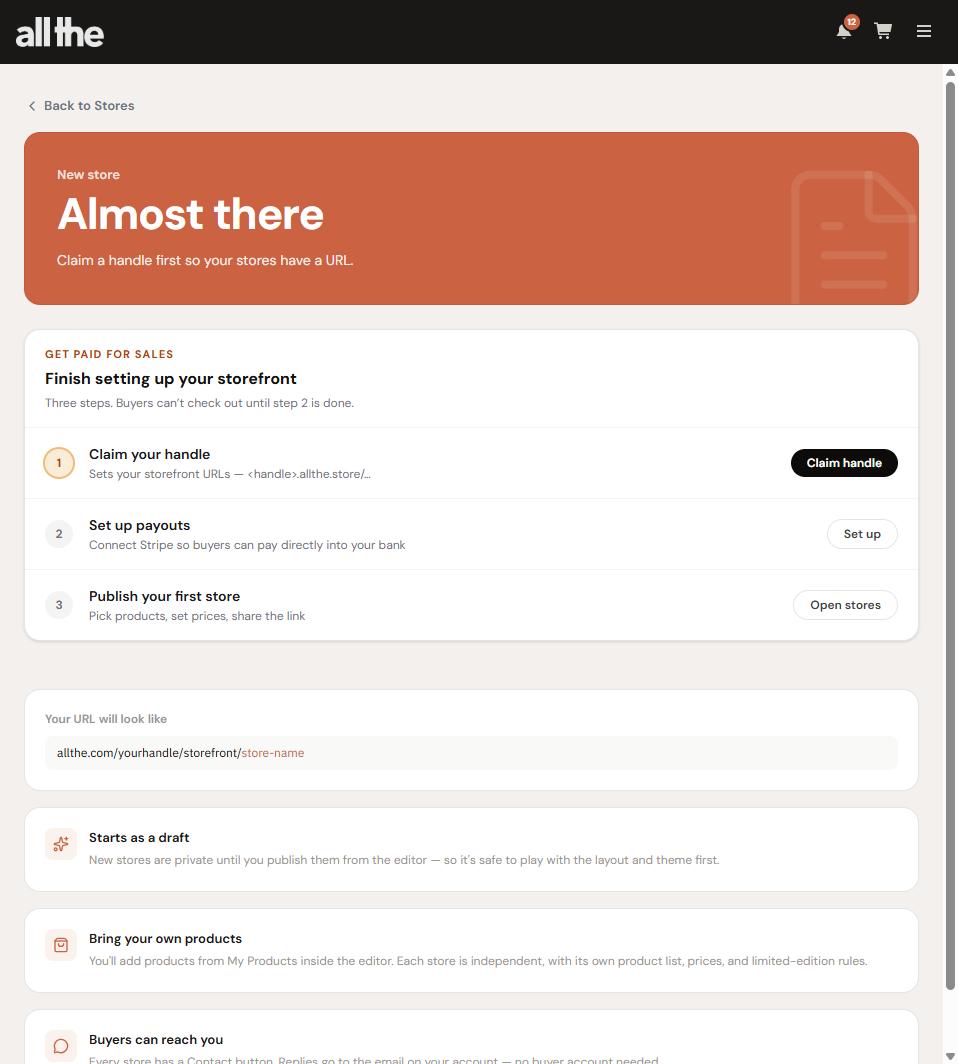
A new store starts as a draft. Drafts are private, so you can rearrange the layout, try themes and change your mind as many times as you like before anyone can see it.
5Add products and prices
Inside the editor, pull products across from My Products. Set a per store price override wherever you want this shop to charge something different from your default, and use limited edition rules if a particular drop should stop selling after a set number.
Availability follows what we can actually make. If a blank goes out of stock, the option stops selling on your store rather than taking an order you cannot fulfil.
6Publish and share
Publish from the editor and the store goes live immediately at yourhandle.allthe.store/store-name. Anyone with the link can shop and check out. There is nothing to submit and no review to wait for.
Then share it. Put it in your bio, post it, send it to your list. We count a visit whenever a buyer lands on a published store, so the view and conversion numbers on your storefront dashboard start filling in as soon as the link is out.
When someone buys, the payment lands on your Stripe account and the order drops straight into our production queue. You do not need to approve it, export it or forward it anywhere.
Keeping it running
Two steps sit after your first sale, and they exist for the same reason. Your buyer pays you, then you owe us the production cost of what they bought. That cost comes out of your allthe wallet.
- Top up your wallet. Keep a buffer in it so an order never arrives with nothing to pay for it.
- Set up auto top-up. Card, PayPal or Direct Debit, charged automatically when your balance dips. This is the one that stops a sale ever blocking while you are asleep.
Worth doing before your first sale, not after. A live store with an empty wallet and no auto top-up means the first order arrives blocked and waits for you to fund it. Set auto top-up while you are thinking about it.
Who gets paid what
You set the retail price. Your buyer pays that to you through Stripe, and Stripe takes its own processing fee. We charge you the production cost of the order plus its postage, taken from your wallet, and a small platform fee on the sale. What is left over is your margin, and your storefront dashboard shows it as earnings alongside revenue so you can see both.
Because your buyer buys from you, you are the merchant of record. Your store carries your name, your contact address and your policies, and refunds are yours to issue from the dashboard.